Showing posts with label art in social studies. Show all posts

Wednesday, April 3, 2019

You Down With OPV?

You down with OPP (Yeah you know me)
Who's down with OPP? (Every last homie)

Large chunks of the “OPP” song (by Naughty by Nature, 1991)  are pretty inappropriate for me to send out through work email.    So, don’t think about those parts and we’re all good.

And don’t listen to it on your work computer or with students around. Just saying!


Instead of “OPP”, we’re going to talk about “OPV”
Like Naughty by Nature has said, “O is for Other, P is for People”
The last “V”, well, that’s not so simple.

I won't get into that, I'll do it...uh...sorta properly.

Ok, ok, enough silliness. This IS really a strategy and it IS really called OPV. O= Other; P= People; V=Views.

Our benchmarks ask us to look at multiple perspectives frequently -- particularly with historically underrepresented groups. We even have a benchmark about seeing history through the eyes of the people who lived it.

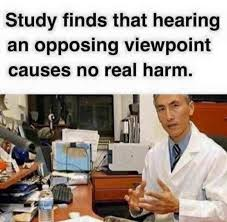
We also have a current societal problem where people live in echo chambers where they don’t actually experience opposing viewpoints in their social circles -- or if they do, the common response is to ridicule and mock the other side.

So how can we help kids learn to examine Other People’s View? I’m down with OPV (I know i sound old. I can live with that)

OPP, how can I explain it? I'll take you frame by frame it.
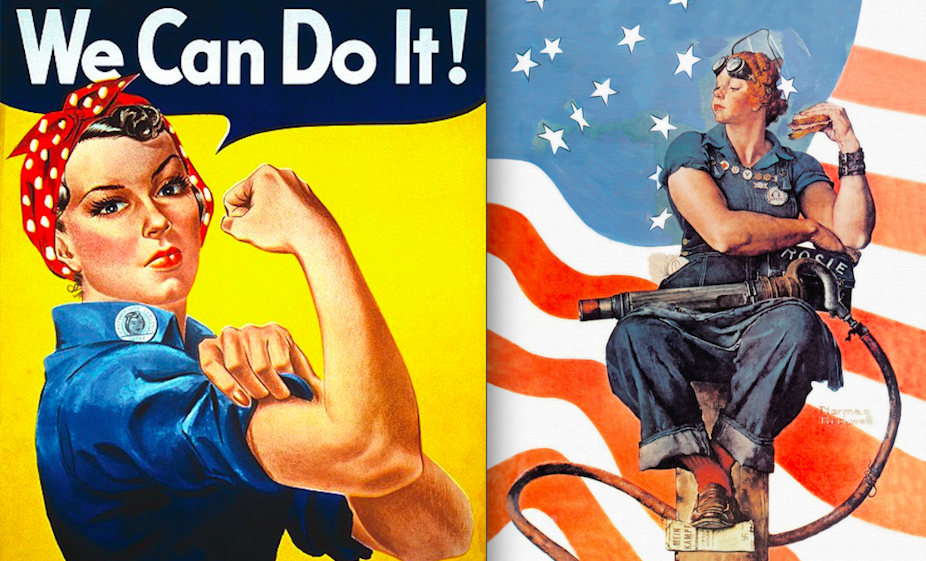
This is a hook activity that’s intended to be an introduction to a lesson and should take less than 10 minutes. Other People’s View (OPV) is from CoRT Thinking Tools , an exploration tool to broaden perception. It’s a very important part of thinking to be able to see the different points of view of other people -- not just your own. The OPV helps kids to broaden their (our?) overall thinking about a situation.. ​​​
Here’s how to do it:
Step 1: Display a photograph (or painting or another visual stimulus)  without giving background information. Have students analyze the photograph. ​​​
Step 2: In each of the thought bubbles have students individually write what they think the people/animals/objects in the image may be saying, thinking or representing. This step is intended to help students think about different points of view.​​​
Step 3: Have students share and compare the comments they wrote in the thought bubbles with a partner or in groups. ​​​
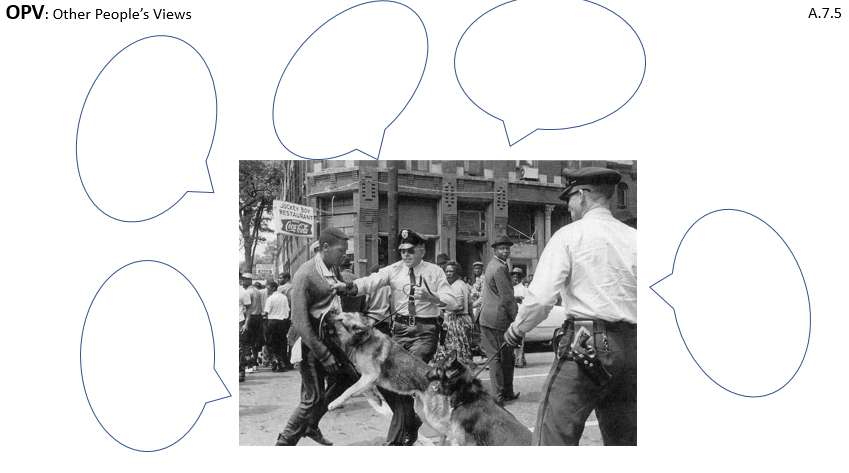
Step 4: Debrief whole class making connections to related concepts and establishing historical context.​​​
The example here shows a famous photo of police dogs and a Civil Rights demonstrator in Birmingham in 1963.  How can students attempt to understand viewpoints of the the demonstrator, the bystanders, the police, --even the dog?  \

How can we get use this tool to get students to look at multiple viewpoints?

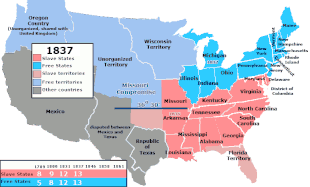
We can try this with photographs, of course. But political cartoons and paintings work, too. Here’s a Civil War cartoon about Lincoln. The caption (which may be too small here for you to read), says “Lincoln’s Last Warning: ‘Now, if you don’t come down, I’ll cut the Tree from under you’”.     

This is an easy strategy to set up! Just open a word document, paste the image you want in the center (leaving big margins) and insert the speech-bubbles.

If you don’t know where to find those, go into Word, under “insert” click “shapes”. At the bottom should be several versions of “callouts”. Choose one and resize and flip as needed.

That’s it.

Say OPV I like to say with pride
Now when you do it, do it well and make sure that it counts
You're not down with a discount

You’re down with OPV (Yeah, you know me!)

Don’t forget to have your kids share their thought bubbles together to encourage deeper conversation. It doesn’t have to take long and it encourages creative thinking and multiple viewpoints!

Well if you do, that's OPP and you're now down with it
But if you’re not, here's your membership

You’re down with OPV.

Yeah? You know me?

Email me! Tell me how OPV goes!

-Tracy

Tuesday, March 19, 2019

Maps and 10x2

I hope you had a great spring break! Boy, it’s hard to come back to work, the real world, and the time change!

Do you remember what a “double take” is? In cartoons and the movies, the character often exaggerates this by turning his or her head more than once toward the thing they are double-taking on. They look and then they look again.

Man, don’t you WISH sometimes that your students would look -- and then actually look again -- AT CONTENT IN YOUR CLASS?

Let’s see how we can make this actually happen!

Here’s another great “Artful Thinking” strategy from Harvard’s Project Zero. It’s called “Looking Ten Times Two”. Those of you who went to February DWT at the James museum of Museum of Fine Arts had a chance to try this out last month.

I want to dig into the “how to” of this and then I want to talk about some places that you could use this strategy -- hopefully some that will work for you and your kids!

So, here’s what you need. An image -- a painting, a photograph, a drawing, a political cartoon, a map, or a picture of a sculpture.

Try THIS or THIS or THIS or THIS or THIS?


Here’s how it works:
  1. Look at the image quietly for at least 30 seconds. Let your eyes wander.
  2. List 10 words or phrases about any part or aspect of the picture.
  3. Repeat steps 1 & 2: Look at the image again and try to add 10 more words. Or phrases to your list.

This strategy helps students slow down and make careful, detailed observations by encouraging them to push beyond first impressions and obvious features. It can be used with any kind visual art. You can also use non-art images or objects. The routine can be used on its own, or to deepen the observation step of another routine. It is especially useful before a writing activity because it helps students develop descriptive language.

What about using this with a map?


Now, have your kids use the “Looking Ten Times Two” strategy with the maps. Do they get more out of the maps this way?   

It’s hard to get and keep the attention of students. It’s hard, OURSELVES, to slow down and look at things more closely.

Try “Looking Ten Times Two” in order to look more closely at art and maps. See if it helps your kids dig into the visual in a better, deeper way.

Let me know how it goes! As always, email me and let me know how it goes!
-Tracy
 

Tuesday, February 26, 2019

Beginning Middle End

Last week, those of you who were able to attend the DWT at the Museum of Fine Arts or the James Museum got to dig into some wonderful, diverse works of art. In doing so, we got to try out some cool pedagogy called “Artful Thinking”Strategies. These come from Harvard’s Project Zero, which is a cool study on making thinking visible.

Anyhoo, ... I thought it might be nice to a) revisit some of those for those of you who got back in the teaching groove and forgot them and b) introduce them to those of you who were out that day or were at different DWT sites.

So, many of us like a good story, right? For many of us that’s how we were introduced to History -- as a story to be told.

So ...  check out this strategy to use a work of art.

First, picture one artwork you use (or plan to use) in your classroom. It actually works better as NOT a photo.

Got it in your mind? Is it THIS? Or THIS? Or THIS?  Or THIS? Or THIS?

This strategy is called “Beginning -- Middle -- End”

Ok, now, have your kids imagine what the context would be if that artwork were the BEGINNING of a “story”?
Now, how would the context be different if that artwork were the MIDDLE of of a “story” ?
Now, how would that context be different if that artwork were the END of a “story”?

I initially was curious how middle and high school teachers would respond to this. And then I had a high school teacher of AP classes tell me how great it was going to be in those AP classes and I realized that I had been thinking too narrowly...

This is a great strategy to help kids think more richly, more wholey, more broadly about how an artwork intersects with the world... and what the context might look like.  

I love seeing how students can wonder about context around a work of art. And see what they can learn about the actual context.

This strategy helps kids use the idea of a narrative to dig deeper into a work of art. It teaches them to elaborate or extend an idea. It helps kids look for connections, patterns, and meanings.

This strategy is quick and easy. You can use it with any artwork that stands still in time (not a video or something that shows something over time or something. You can have something prepared on the screen/board/handout or you can just wing it and ask the questions as a Turn and Talk, journal moment, bellwork, or discussion.

Try it with whatever artwork moves you. Try it out loud or on paper.

Just try it.

And let me know how it goes!

As always, I love to hear from you! Email me at newmantr@pcsb.org

-Tracy

Tuesday, October 9, 2018

Oh, Crop!


Do you ever show your kids an image, political cartoon, map, chart graph, etc., and find that kids focus on the One Thing in the image and then miss all the “small stuff” and the details?

Oooorrrrr .....

Do you ever find a great image (or map or graph or chart or painting or photo or ....) in your book or somewhere and ask your kids, “Can you look at the small bottom left corner”, “do you see the thing near the top”? “Look at the third column on the graph” ...


And then take 10 minutes trying to get everyone to see what you’re trying to show them?

Oooorrrrrr ....
Do you ever struggle with fitting in multiple perspectives into some lessons?

I like to say,”Oh Crop!” when that happens.
(not really. But it sounds funny)

If you’d like to use more visuals in your class (paintings, sculptures, photographs, maps, charts, graphs, political cartoons, etc.), but you find it annoying and frustrating, check out this “Crop It” strategy!

Here it goes!

What is it? “Crop It” is a hands-on learning routine where teachers pose questions and students use paper cropping tools to deeply explore a visual primary source.

Why Use it?  Life moves pretty fast. We see thousands of images a day and we don’t give many of them more than a second or two of our attention. “Crop It” slows us down to provide time for students to think  and to examine the details that they might otherwise miss. It also helps them “get into the head” of the artist (or creator) of the visual.

Prep:
  1. Choose multiple images for your kids to dig into. Consider some such as:
    1. Various sources like cartoons, propaganda, advertisements, newspaper articles, etc.
    2. Sources that represent multiple perspectives on a topic
    3. Sources depicting the different people, places, events within a unit.
    4. Sources representing perspectives missing from the textbook.
  2. Print enough so that every kid (or pair of kids) have an image and a set of Crop It Tools. Multiple kids can have the same image. You don’t need thirty different images. You can have 5 or 6.
  3. Prepare some higher order thinking questions to accompany the images on the board or screen.

Step One:  Ask kids to choose an image that either:
  1. Connects to an experience they have had
  2. Relates to something they know about
  3. Leaves them with questions
  4. Evokes their curiosity
Step Two: Explore the Image
  1. Pass out two “Crop It” tools to each student.
  2. Demonstrate how to use the “Crop It” tools to focus on a particular piece of a source. Students can make various sizes of triangles, rectangles, and lines of “crop” to focus attention on an important part of the source.
  3. Invite students to carefully explore their image by using the tools. Pose a question and ask students to look carefully and “crop” to show an answer.  Some example questions might include:
    1. Crop to show what first caught your eye. Think: Why did you notice this part?
    2. Crop to show who or what this image is mainly about. Think: Why is this person or thing important?
    3. Crop to a clue where this takes place. Think: What has happened at this place?
    4. Invite kids to use divergent thinking. Where ELSE could you crop to answer the question?
4. Let kids look at other students’ crops, to see what their images showed and what they focused on.


Step Three: Collect evidence.
  1. Collect evidence that students cropped on the board or on chart paper by asking them recall the details they cropped and list that evidence. These charts encourage students to notice details that can be used later.
  2. Relate the evidence back to your Learning Goal (benchmark) or LEarning targets or Essential Questions.

Be careful of ...
  • Asking too many questions during Step Two, Keep it moving quickly so kids don’t get off  task and so they stay focused on their primary source.

What do you think? Is it worth a try?  Do you have enough copies left this month to make a class set of “crop it” tools? Remember -- download them from here and make copies https://www.teachinghistory.org/sites/default/files/2018-08/crop_it_tools.pdf